
I will preface this by saying I am no expert. I will be sharing a few simple tips that you can apply to up your photos.
Lets get into it.
Natural Light is King
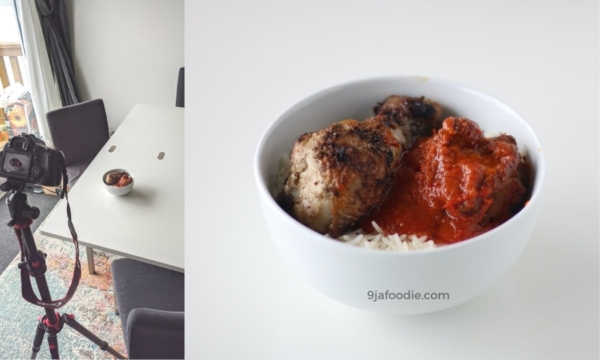
Whenever possible, shoot with natural light. Next to a window, next to a door. Natural light really cannot be matched when it comes to food photography.
I typically try to shoot most of my photos in natural light. In current location daylight varies greatly depending on time of the year.
- Shortest day – December – 9am to 5pm – 8 hours
- Longest day – June – 5am to 9pm – 16 hours
I try to plan my shoots around this. My artificial light shooting is not that great (I have not taken time to learn 😁)
If you are unable to shoot during the day (because life), you need to know some basics
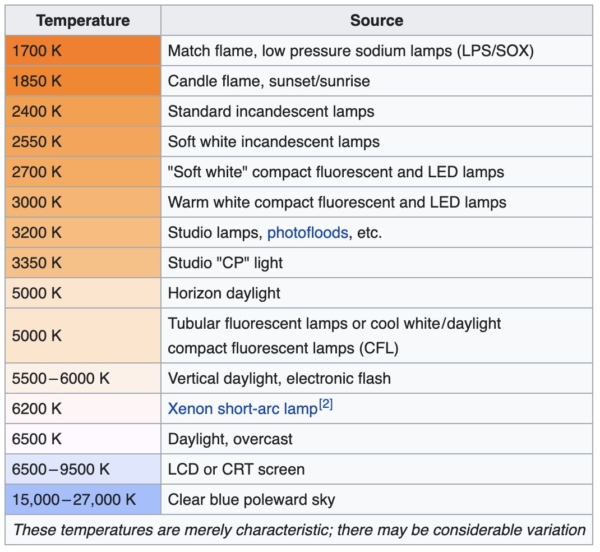
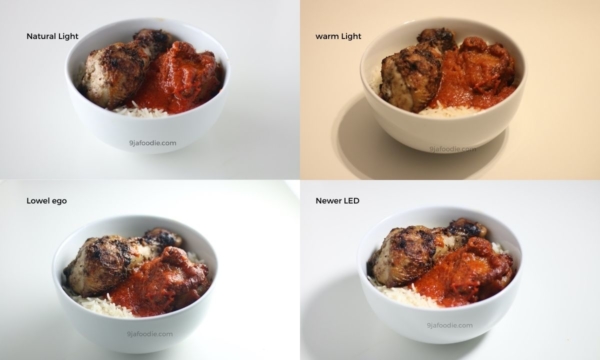
For most food photos, anything under 5000k (yellow light) is a no-no. You want your indoor or artificial light to be as close to day light as possible – 6500k
Rice & stew – Warm light
Protip: If you purchase artificial light, pay attention to the Color Rendering Index (CRI) as well. This is how well this light source replicates colours in comparison to natural light.
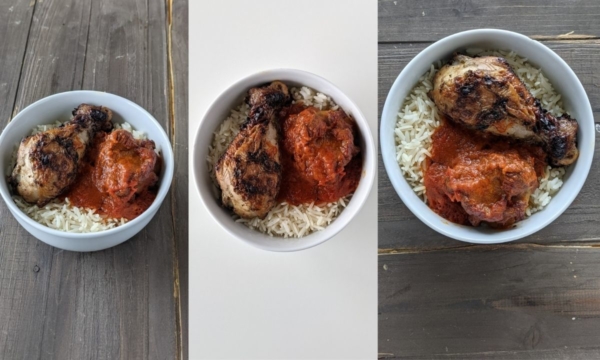
See below comparison using the two artificial lights I have.
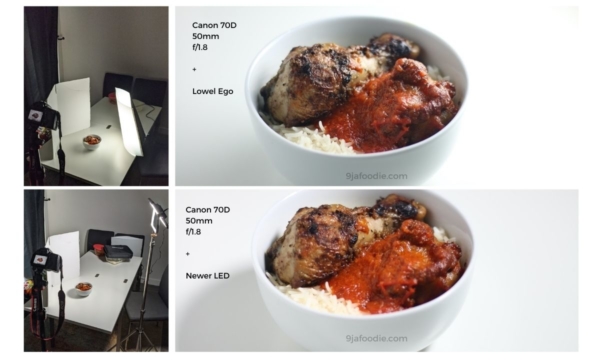
This is how all 4 photos look
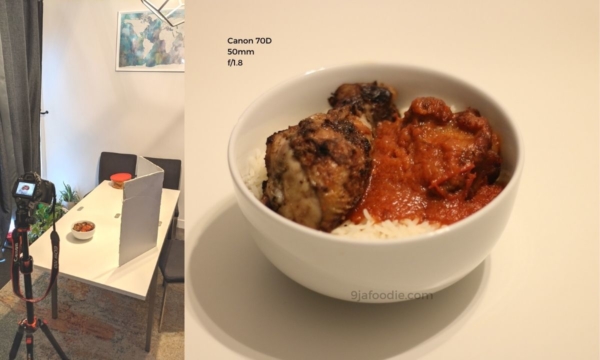
Protip: Use a reflector to even your lighting and reduce shadows in your photos.
I use a dollar store craft board as my reflector. You can make your own by taping white sheets of paper to a cardboard sheet.


You can also get reflectors on amazon.
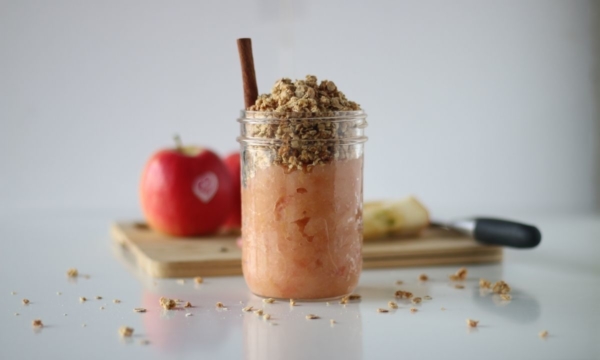
Light Color Dishes and Background
Professional photographers can work with most color dishes and create a composition that will look amazing.
As a beginner, the easiest colour to work with are light colours. I stick with white when I am trying not to complicate things.
Which on white might be tough on the eyes. You can create contrast by using a darker background.
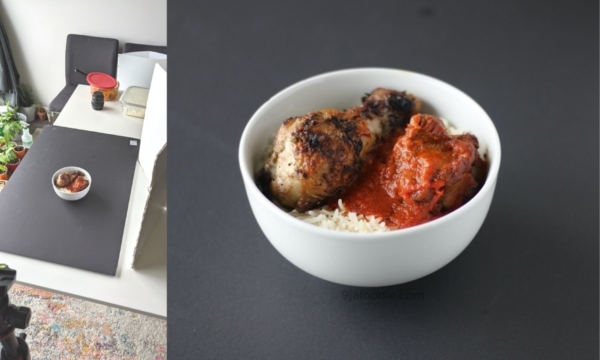
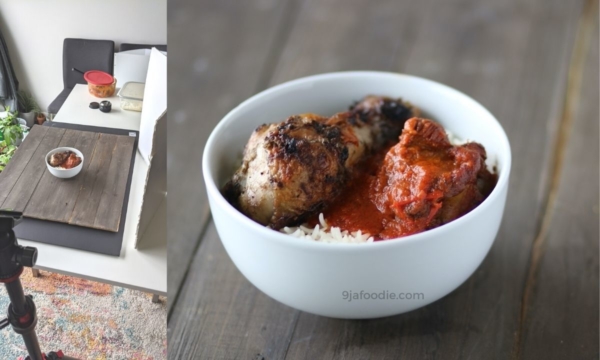
Plain background works most times as beginners. Feel free to experiment with adding props to the background.
It is tricky to find that balance between natural and staged look.
Keep Learning
When planning your shoot, visit pinterest and other blogs to get inspiration – Inspiration is not copying o. Look for similar recipe style and see which one works for you. Explore different camera angles, top shots, portrait shots, angled shots etc.
Try to apply any of the shots that ‘speak’ to you and your style.
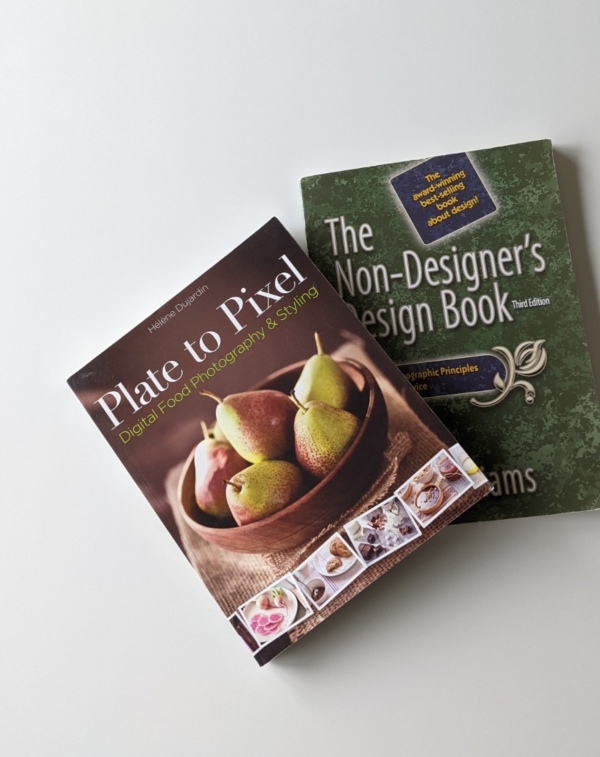
Invest in some food photography books and tools. Plate to pixel is a great book on food photography.
Bonus
Post-production edits – I rarely edit my photos aftershoots unless I am doing collaboration work for a brand.
In these cases, I typically shoot with my camera in RAW format for more flexibility when it comes to editing.
The photos app on android or iOS devices does a pretty good job with a few minor edits (increasing exposure or sharpening images). You can do these on instagram as well before you post.
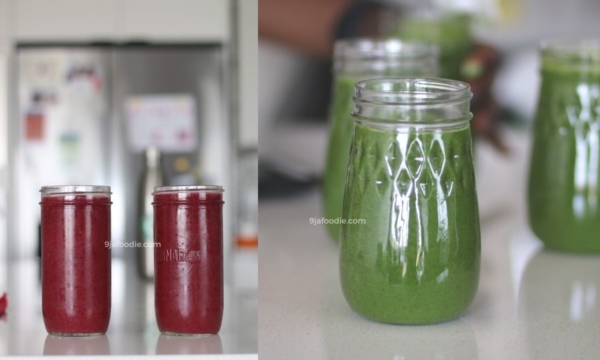
Drink shots – Vertical photos work best for drink shots. Depending on what you are shooting with, you can achieve good depth of field (blurred background) and make your subject stand out more.
Using the portrait mode on android or iOS can achieve the same effect as well.
You Can Use Your Phone – Most mobile devices these days come with pretty decent cameras. As a beginner, you do not need a fancy camera to start. You can use your mobile device and still get pretty good shots. See below phone shots.
Summary
Regardless of what you are shooting or what camera you are using. Using natural light will certainly help. Light/white dishes are great and you need to keep learning if you want to get better :)
Hope you learnt something.
My Gear & Tools
Camera – Canon 70D w/ 50mm & 85mm lenses
Product Light – Lowel Ego Light
I appreciate the author’s tips on food photography. I think they are helpful for beginners like myself.
I especially agree with using natural light and not over-editing photos.
Additionally, I like the idea of using a plain background to keep things simple.
This is an excellent article for those just starting in food photography.
Thanks for the advice!
Thanks for this information. I now know what to do when next i take food photo
Wow….what a great write up.indeed I have learnt something perfect here today. Thanks alot.